Sunday, July 26, 2009

First Broccoli of the Season - What a Beauty!


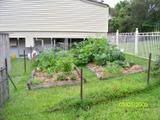
Okay, I have to admit that my vegetable garden can be a bit "hit and miss" - mainly because of neglect from me, but also because of some kind of animal invasion which can destroy a months work in a couple of minutes! So when I get a "hit" I can get pretty excited. I was thrilled yesterday to find this beautiful broccoli in the garden. It hasn't had a single chemical, powder or spray used on it and it is huge, full and completely bug free. I feel like I should do something special with it - I will look at some recipes today.


I have had the vegetable garden going for about 2 years now. Dan built it for me out of logs from some trees that he had to cut down. It is behind the house, so doesn't always get the best sun - but it seems to do okay.


Tuesday, July 21, 2009

Belly full of Baby


Exciting News!
We had the vet out this evening to pregnancy test Daisy the cow. When we bought her, we were told that she was likely to be pregnant, but only just - which would have had her due in January 2010. The previous owner really wasn't sure, and seeing as though you need to stop milking 2 months before the calf is due, we wanted some more certainty.

So the news is - Yes she is pregnant - and due in about 3 months!

This is great. Her milk supply has started to slow down recently and we were thinking that January was a long way off before she "freshened up" as they say.

Now fingers crossed for a little heifer calf. The bull would have also been a guernsey, so a bull calf wouldn't be much good for meat but a heifer will make a great milker when she is older. We are looking forward to having a calf also, so that we can drop down to once a day milking. We plan on penning the calf overnight to allow Daisy's milk to build up, before milking her in the morning - then leaving the calf with her for the rest of the day - thus doing away with the evening milking. She will make plenty of milk for a calf and for us. We might then get another cow and calf so that we milk 2 cows once a day. This will give us the same volume of milk, and only one chore to do! By the time we set the dairy up and clean up afterward, milking another cow at the same time would take very little extra time.

So stay tuned for baby news in October!

Tuesday, July 7, 2009

Making Chicken Stock


As much as I love my chickens - there are times when they have to go...


about 6 months ago we hatched out some chicks, and 2 were roosters. My poor girls have been struggling, with 3 roosters in the hen house - so some nutritious stock needed to be made. I love chicken stock made using the nourishing traditions (http://www.fishpond.com.au/product_info.php?products_id=34643) recipe. In this book, Sally Fallon outlines the benefits of stock, saying that "properly prepared, meat stocks are extremely nutritious, containing the minerals of bone, cartilage, marrow and vegetables as electrolytes, in a from that is easy to assimilate. Acidic wine or vinegar added during cooking helps to draw minerals, particularly calcium, magnesium and potassium, into the broth."


So the recipe goes like this!


1 whole free-range chicken or chicken pieces

(chicken gizzards and feet can be used too)

4L cold filtered water

2 tbs vinegar

1 large onion, coarsely chopped

2 carrots, peeled and chopped

3 celery sticks, chopped

1 bunch parsely


I use the slow cooker, but I have also made it on the stove top. Place chicken into large stainless steel pot and cover with cold water, vinegar and vegies (except parsley). Let sit for 30-60mins. Bring to a boil and skim any scum from the top. Reduce heat, cover and simmer for 6 - 24 hours. The longer you cook the stock the richer and more flavourful it will be. About 10mins before finishing, add the parsley. This will impart more mineral ions into the broth.


Remove the chicken with a slotted spoon (you can use the meat for salads, sandwiches etc). Strain the stock into a large bowl and reserve in the refrigerator until the fat rises to the top and congeals. Skim off this fat and reserve the stock in covered containers in the refrigerator or freezer.


This stock is delicious and a perfect base for soups and casseroles in the winter. And my hens are much happier!

Saturday, July 4, 2009

Making Yoghurt


I have had so many people ask me how to make yoghurt that I thought I would write it down. My yoghurt has become better and better lately - not sure if it is because I have finally decided on a method and follow it, or if the culture has become better over time.

Here we go.

1. (Use 1L of milk for every 1L of yoghurt you would like.)
Gently heat the milk in a saucepan to 85deg Celcius. (180deg F)
Heating it gently means it is less likely to burn on the bottom and protects the enzymes in raw milk as much as possible. Stir it regularly.


2. Allow the milk to cool until it is 45deg Celcius (110deg F)
3. Place it in the jar and add 2tbs of your previous yoghurt

(Sometimes I add about 2tbs of "Esiyo" dried yoghurt sachet and keep the rest in the fridge until next time-this is good for those times when you eat all of your yoghurt before you remember to make another batch!)


4. If you like, you can also add about 2 tbs of sugar or equivalent of other sweetener (like stevia) and 2 tsp of vanilla. I also like to add 1/3 cup of full cream powdered milk to help make the yoghurt really thick and creamy. Mix well.

5. Keep yoghurt warm for about 8 hours. There are lots of different ways to achieve this but my favourite is to use the oven. Turn the oven on low for about 30secs to warm it up. Then turn it off, but leave the pilot light on.


6. Put yoghurt in the fridge. Delicious!

I hope you have great fun making yoghurt. If you like fruit flavours in your yoghurt, the best way I have found to flavour them, is to add jam to the yoghurt, after it has set. As the jam is sweet, you won't need to add any sweetener to the yoghurt. We use "sugar free" strawberry yoghurt - and it tastes just like strawberry flavoured yoghurt from the shops!